
 There are some easy and simple steps that can help your machine look nice and clean.
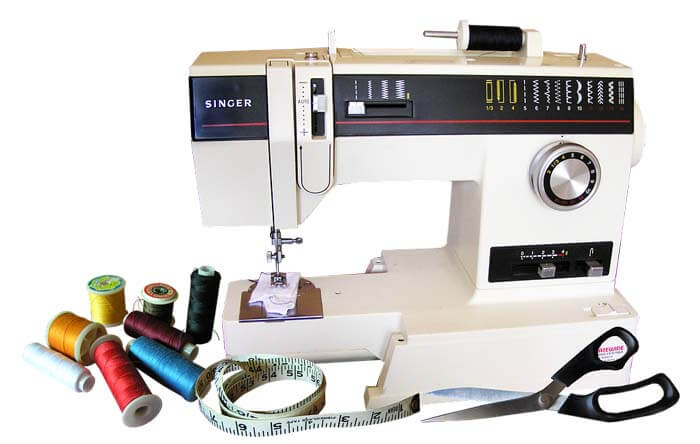
I have prepared a full-fledge guide that has detailed steps on how to polish a vintage Singer Sewing Machine.
If you want your machine to be like it did dew years ago, then this article is for you.
I will only mention the steps that are easy for you. All of the steps that I am going to mention will be very easy; for best results, follow maximum steps.
I’ll also be answering some of the frequently asked questions; in the end, make sure that you don’t miss that part. I hope that you find this article helpful.
Now, if you are interested, make sure to read this article till the end.
Know The Finish Of Your Vintage Machine
The first step before polishing your antique machine is to know what finish does your sewing machine has.
This is a very crucial step as it will help you to choose the products that you should use to clean your vintage sewing machine.
All Singer Machines have a clear coating on them that protects the actual machine. It protects the machine to some extent.
Now, one may ask that why this step is important.
Well, if a person uses a product that does not suit the finishing of the vintage machine, it may ruin the whole look of the machine.
That is why you need to know the finishing of your sewing machine.
When you know the finishing of your machine, it is comparatively very easy for you to know which product to use on the machine.
I can help you in determining the finish of your machine. For example, very early models of Singer’s machine used to have the coating of shellac.
It was actually very damage-prone. I know that this example is not enough; hence I have a proper guide on how to determine the finish of your vintage machine.
All you have to do is follow these simple and easy steps that I am going to mention:
Step 1:
Find an unnoticeable spot on the bottom of your vintage machine. It must be inconspicuous. Otherwise, this procedure may ruin the look of your machine.
Step 2:
Take a small cotton swab. Dip it in a little bit of rubbing alcohol. Do not use more than three drops of rubbing alcohol. Take a small amount of it and make sure your cotton swab is damp.
Step 3:
The last and final step is to dab the cotton swab that you dipped in rubbing alcohol on the hidden spot that you chose in the first step.
If the top layer dissolves easily, it means that the finishing is shellac. If the finishing becomes tacky and sticky, it means it is either lacquer or varnish.
Know the condition of the finish
Now that you have successfully completed the first step, half of the inspection is done. Now you have to take a close look at the condition of your sewing machine. Especially, check around the decals. Look for any scratches or places where the coat is cracked.
If your finishing coat is cracked, then I will suggest you get a clear coat on your Singer machine. It is best if you hire a professional to recoat your machine.
On the other hand, if your finish is fine and there are only some scratches, then follow the procedure of cleaning and polishing that I will be mentioned in my next steps.
Would you please not ignore this step because if you polish the cracked surfaces, it may damage the decals on your Singer machine? This step will actually tell you if you need to follow the next given steps or not.
Cleaning with soap and water
Now, if your machine only has scratches and the upper coat is intact, then proceed with the step. Before polishing your Singer machine, you must get rid of the dirt that has been sitting on your machine for a long time.
You do not need a fancy soap for this step. You can use your normal soap. If your machine has a shellac finish, then opt for a very gentle soap that does not have alcohol in its ingredients.
I will suggest that you look into the ingredients thoroughly and then use them. No matter what the finish of your machine is, gentle soap is always a safe choice. If you are sure that your machine has a varnish or lacquer finish, then you can use any soap.
I have also divided this process into easy steps to make this article beginner-friendly.
Step 1:
Make a mixture of soap and water. Warm water is recommended for best results. It should not be too hot.
Step 2:
Take a clean cloth. For best results, use a cotton cloth. Dip it in the mixture that you created (refer to step 1). Start with the areas that are inconspicuous.
If anything happens to the finish, stop immediately. Use as many cotton cloths as you need to clean the whole machine. Move the cloth gently on the surface of the machine. Don’t rub, or it may damage the paint or finish of your antique sewing machine.
Step 3:
If you have reached this step, your machine must be soaking wet. In this step, take a clean, dry cloth and dry your machines.
If you want better results then, select a spot, clean it with a cotton cloth dipped in soap and water, and dry it right away. In this way, the finishing of the antique machine will remain intact for much more time.
Remember to be gentle while washing. Do not wash the spots from where the coating is not intact.
Polishing the machine with machine oil
Now that your machine is neat and clean move on to the oiling. Never oil a dirty machine; always wash it gently before oiling. Your machine should be bone dry at this stage because wetness may ruin the process of oiling.
As we all know, that water and oil do not mix well, so make sure your machine is dry.
Place your machine on a clean, dry cloth. The cloth will absorb access water from the machine. Now, the fun part comes, oil the machine. Make sure to oil the machine in gentle circular motions.
You can use a precise paintbrush for the areas that are a little hard to reach. One tip that I will give you is if you have some sticky spots due to any reason, leave the oil on those areas for several hours or overnight.
The sticky residue is easily dissolved in the oil, which will give you that sleek finish that you are looking for. You can use any machine oil for the oiling procedure. You can oil the bare metal portions with the machine oil too.
Finish off with wax
Last and the most important step to give your machine a polished look is waxing your sewing machine. Any carnauba wax will do the job.
All you have to do is take a small amount of the wax, apply it to the machine and then buff it off in circular motions. Make sure that you polish the wax in both directions for an even look.
FAQs
Are Vintage Sewing Machines Better?
There is no right or wrong answer to it. It totally depends on you if you are more comfortable with your old sewing machine or do you need a new one. Of course, the new machines are easier to use and have more features, but it does not necessarily make them better.
How to Clean and Care For Your Older Sewing Machine?
Make sure that your machine is covered with a cloth when you are not using it. Dust is the biggest enemy of your machine. You can clean your machine with soap and water. For details, read the article.
Can I use coconut oil on my sewing machine?
Yes, you can use coconut oil on your machine, but it is always better to opt for machine oil as it is made for machines.
Wrapping It Up
I hope you enjoyed reading this article. If you still have any queries make sure to go through the article again. I hope this article increased your knowledge. Happy sewing to you!!